The last wipe before a finish is a small step, but it sits inside a much larger preparation process. A tack cloth can help collect loose dust; it cannot correct an unsuitable coating, remove every kind of contamination or undo rushed sanding. This guide shows how to plan the dust-removal stage of a modest wood project, decide whether a tack cloth belongs in your chosen finish system and keep the work organized from sample board to final inspection.
Choose the finish system before the cleanup method
Begin with the product you intend to apply to the wood. Read its surface-preparation instructions, application requirements and relevant safety information. The finish manufacturer determines what belongs before and between coats. A general-purpose tip from a project video should not override a requirement for a specific stain, paint or clear finish.
This order prevents a common planning mistake: buying preparation supplies independently and assuming they all work together. A cloth described as useful before painting is not automatically suitable for every paint. The same caution applies to cleaners, solvents, sanding sequences and conditioners. Think of the project as a set of compatible steps, not a collection of individually attractive products.
Write a short finish plan before opening anything. Name the substrate, its current condition, the intended coating and the preparation method that coating specifies. If you are working on a previously finished object, confirm that the instructions apply to that situation rather than borrowing a process intended only for bare wood.
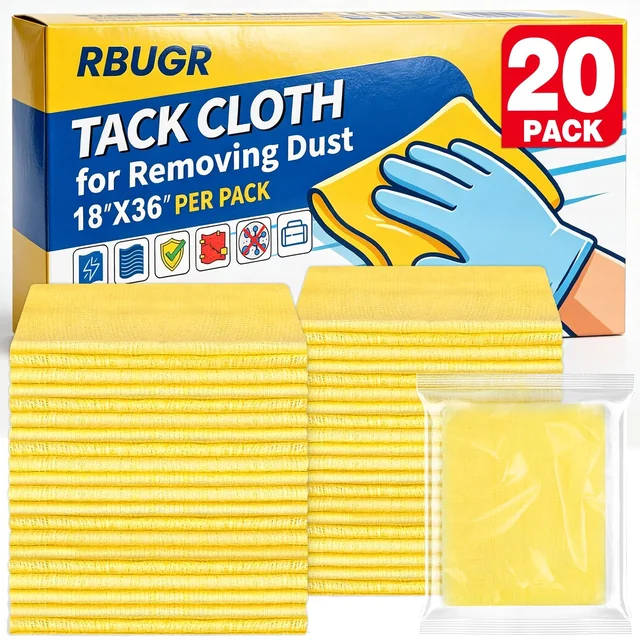
The RBUGR home and projects collection includes a twenty-pack of tack cloths. Treat it as a candidate for the dust-removal stage after you establish compatibility, rather than the starting point that decides the rest of the process.
Understand the cloth's limited, useful role
The selected RBUGR listing describes cotton web impregnated with polyisobutylene, with each cloth measuring 18 by 36 inches unfolded. It states that the product is wax-free and silicone-free. These are the listing's material and size details; they are not a universal promise that the cloth leaves no residue under every pressure, temperature or application method.
Its intended role is to pick up loose sanding dust and lint during suitable surface preparation. That is different from stripping a coating, removing grease or repairing a surface. If the finish instructions call for cleaning before sanding, a final dust wipe does not replace that earlier step. Keep the different tasks separate in your plan.
Minwax's wood-finishing guidance describes removing sanding dust with a vacuum, dry paintbrush or cloth.1 The useful principle is that dust removal is part of preparation; the exact tool choice still depends on your project and coating. You do not need to turn one tool into a solution for every surface condition.
“remove all sanding dust using a vacuum, dry paintbrush or cloth.”
Minwax, Wood Finishing Basics1
A clear role makes shopping easier. If what you need is a household cleaning wipe, a food-contact cloth or a skin-care wipe, this is a different product. The tack-cloth detail page keeps that intended use visible alongside the pack count.
Read the surface before reaching for a cloth
Look at the project in good light and describe its condition. Is it bare wood that has just been sanded, an existing finish prepared for recoating, or an object with an unknown coating? Are you seeing loose dust, a scratch, a sticky area or an uneven surface? These observations point toward different preparation questions.
Do not assume that anything visible can be wiped away. A sanding mark remains a sanding mark even after the dust is removed. A defect in an existing coating may need a different process altogether. Follow the selected finish's guidance and seek appropriate advice where the existing material is uncertain.
Be especially cautious with old or unidentified painted surfaces. This article is about organizing an ordinary preparation workflow, not identifying hazardous coatings or providing a removal procedure. Resolve that question before sanding or otherwise disturbing a surface. A neat workbench and a dust cloth do not make an unknown material suitable for a casual project.
Once the substrate and preparation method are established, mark the sequence on a simple task card. Separating inspection, preparation, dust removal and coating helps you avoid repeating steps or applying finish before the surface is actually ready.
Use a sample board to answer compatibility questions
A sample board is a small version of the process you intend to use. Choose a representative offcut or suitable inconspicuous test area and follow the coating manufacturer's instructions. Match the wood and preparation as closely as practical. A result on unrelated scrap may tell you less about the project than you expect.
Record the preparation method, cloth used and application sequence. The record should make the test reproducible. If the final surface looks different, you can compare the actual steps instead of relying on a vague memory of having done roughly the same thing.
Change one variable when investigating a result. If you change the sanding sequence, cleaner, cloth and coating at once, it becomes difficult to identify which change mattered. A controlled comparison is more useful than a series of unrelated experiments, especially when you have only a limited amount of matching scrap.
Inspect the sample at the stages specified by the finish instructions, including the relevant drying or curing period. Do not treat a freshly applied appearance as the final result. The purpose of testing is to make a decision before working on the whole object, not to justify proceeding with a method you have already committed to using.
Arrange the work area around the sequence
Set up a place for preparation and a place where the coated project can remain undisturbed under the conditions the finish requires. In a small workspace, these may be the same bench at different times. What matters is that you plan the transition instead of trying to clear a space while holding a freshly coated part.
Keep unused cloths in their individual wrappers until needed. Place used materials in the location and container required by the relevant product instructions. Do not create a miscellaneous pile of wipes, coating-soaked rags and packaging; different materials may have different handling and disposal requirements.
Arrange tools in the order you will use them. Put the inspection light where it will be useful, keep the project notes within reach and make sure you can access all intended surfaces without balancing the object awkwardly. A stable setup reduces the temptation to rush the final wipe just to get the project moved.
Use the ventilation, protective equipment and other precautions specified for the actual products and work. Tack cloths do not replace dust control or the requirements associated with sanding and coatings. The organizational suggestions here should fit around those instructions rather than compete with them.
Keep the final wipe controlled
For a compatible application, follow the cloth and coating directions and use a light wiping action. Think of collecting remaining loose particles rather than scrubbing the surface. Applying more pressure is not a reliable solution when the underlying problem is a contaminant or surface defect that belongs to another preparation step.
Work methodically over the intended area, keeping track of what has been checked. Turn to a cleaner face as the cloth collects dust, and replace it when it no longer performs the intended pickup effectively. There is no fixed square-foot coverage claim here: the amount and kind of material on the surface will vary.
For edges and recesses, plan access before coating. A flat tabletop is not the same handling problem as a frame with corners and profiles. Avoid forcing a broad cloth into an area in a way that catches or drags it. Use the preparation method appropriate to the shape and the finish instructions.
After the wipe, inspect again. If you find a scratch, mark or unfamiliar residue, pause and determine what it is. Repeating the same wiping motion without understanding the problem can obscure the decision rather than solve it. The final check is part of preparation, not a ceremonial step before opening the coating.
Treat water-based finishes as a specific compatibility check
The label wax-free and silicone-free provides useful material information, but it does not certify compatibility with every water-based finish. Check the coating's instructions for the required dust-removal method. If they specify a particular type of cloth or a dampened alternative, use that guidance rather than assuming all tack cloths are equivalent.
For example, General Finishes' Milk Paint instructions list several dust-removal options, including an oil-free tack cloth or a water-dampened rag.2 That is guidance for the named finish; it does not establish that this RBUGR cloth is the specified oil-free product, nor that the same options apply to another coating.
This distinction is easy to overlook when comparing short product descriptions. One material claim does not necessarily imply another. If you need a property that is not confirmed in the cloth's information, obtain confirmation or choose the method expressly supported by the finish manufacturer.
Use your sample board when the instructions allow a choice and you want to compare results. Record exactly which method you used. A satisfactory test can inform your project, while an untested assumption about an entire coating category cannot. Keep the conclusion narrow enough to match the evidence.
Make a task table instead of a shopping list
A shopping list tells you what to buy. A task table tells you why each item is there and when it should be used. For a modest project, five or six rows are enough. Start with the steps required by the coating and fill in the supplies only after each task has a clear purpose.
| Stage | Decision | Completion check |
|---|---|---|
| Identify | What substrate and existing coating are present? | Unknown materials resolved before disturbance |
| Plan | Which coating system and preparation apply? | Current instructions available |
| Test | Does the proposed sequence suit a representative sample? | Result inspected at the required stage |
| Prepare | What cleaning and sanding steps are specified? | Required sequence completed |
| Remove dust | Which permitted method will collect remaining particles? | Surface inspected again |
| Finish | What conditions and timing does the coating require? | Project can remain appropriately undisturbed |
Add a small notes column if another person will help. Record uncertainties openly. A blank answer about compatibility is a reason to investigate, not a reason to copy the method used on a different project.
Plan the twenty-pack without inventing a yield
The RBUGR pack contains twenty individually wrapped cloths. Individual wrapping makes it practical to keep unused pieces separate while opening what you need for the current task. It does not establish how many projects the pack will cover or how long an opened cloth remains suitable.
Estimate your needs by the number of preparation sessions and the condition of the surfaces, then keep the estimate flexible. A small project with several separately prepared components may use supplies differently from one large flat panel. Repeated coating stages also depend on whether the finish instructions call for preparation between coats.
Do not continue using a loaded cloth simply to meet an imagined cost-per-project target. Equally, there is no need to open several wrappers before the work requires them. The useful habit is to inspect the cloth's condition and the surface, then make a decision based on the task.
Store the remaining supply according to the product instructions, with the label available. Keep it distinct from household cleaning materials and food preparation supplies. If your project is a display for a party table, place food on suitable serving ware and use the finished object only for its intended application. A decorative purpose does not establish food-contact suitability.
Read a small review sample carefully
When checked on September 16, 2026, the selected tack-cloth listing showed a 5.0 average from four ratings. Four is a small sample. We show the count alongside the stars because an average without its context can look more conclusive than it is.
The visible review sample included comments about picking up sanding dust, the convenience of the pack quantity and a customer's favorable experience during a repainting project. These are individual accounts. They do not establish universal residue-free performance, guarantee a defect-free finish or replace a coating manufacturer's compatibility requirements.
Use the comments to identify practical questions: will the cloth suit the specified preparation process, is the pack quantity manageable, and how will used pieces be handled? Those questions are more transferable than another shopper's exact result on an unspecified surface.
The product page separates our editorial explanation from the Amazon rating snapshot. We have not conducted a laboratory comparison or independently reproduced the reviewers' projects. That distinction leaves room for useful feedback without turning it into a promise.
Leave time for the final inspection
Before applying the finish, read the task card once more and inspect the surface in useful light. Confirm that the required preparation is complete, that any test result supports the chosen method and that the work area is ready for the next stage. This is also the moment to notice whether a part was missed while the project was moved.
If something is uncertain, resolve it while the surface is still accessible. A short pause can be less disruptive than discovering a preparation question after the first coat. Do not let an event deadline turn a question into an assumption. Our delivery guidance makes the same point about allowing time for inspection when supplies are ordered for a dated project.
After the work, retain the product names and sequence in a project note. Record what you actually observed and what you would change next time. Keep the note specific to that substrate and coating. Over time, a small collection of accurate project records is more useful than a universal rule built from one success.
If your finished project is part of a celebration setup, our edible shimmer planning guide covers the food-decoration side separately. For packaged take-home gifts, see the lip balm favor guide. Keep workshop, food and cosmetic materials in their own appropriate work areas.
Save the process, not just the finished photograph
A finished photograph shows appearance, but it rarely explains how the surface was prepared. Save a short process note alongside it: the substrate, coating, relevant product instructions, preparation sequence and any sample-board observations. That record helps you repeat the parts that worked and recognize where a future project differs.
If you share the project with someone else, distinguish a product specification from your own experience. You can describe using one cloth during a particular preparation session without claiming that every shopper will obtain the same coverage. You can also mention a successful result without attributing every aspect of it to the final wipe.
Keeping that distinction makes the record useful over time. It turns one completed project into a reference for asking better questions on the next, rather than a rule that might be applied to an incompatible finish. Good preparation begins with those specific questions.
Sources and editorial notes
This original RBUGR guide describes project organization and product-selection questions. It is not a tested finish recipe, a hazardous-material removal procedure or a guarantee of coating performance. Product specifications and the Amazon review sample were checked on September 16, 2026. Follow current instructions for the actual substrate, cloth and finish.
- Minwax: Wood Finishing Basics. Source for the place of sanding-dust removal in a preparation sequence.
- General Finishes: Milk Paint instructions. A product-specific example of dust-removal options, not a certification of this tack cloth for that finish.