A shimmer finish should make your celebration easier to enjoy, not harder to plan. Start with the food, the people sharing it and the effect you actually want. Then choose a color and a small, controlled test. This guide walks through a practical planning process for drinks, desserts and a coordinated table, using the RBUGR twelve-color luster dust collection as a concrete example.
Start with a menu, not a bottle of color
It is tempting to buy decorations first and design the food around them. A more useful order is to decide what you are serving, how it will reach the table and how much preparation time you have. A pitcher prepared in advance presents a different decorating problem from individually finished cupcakes. The same goes for a seated dinner compared with an open-house buffet where people arrive over several hours.
Write down three things for each item: the base color, the serving container and the person responsible for finishing it. Those details give you a simple design brief. A transparent glass lets guests see a drink throughout its depth; an opaque mug does not. A dark chocolate surface starts with a different background from white icing. These are observations to test in your actual setup, rather than promises about how any particular powder will perform.
For a first attempt, choose one decorated item and leave the rest of the menu familiar. You can create a coordinated table through napkins, place cards and serving dishes without adding shimmer to everything. This approach also leaves an undecorated option for guests who prefer it. Our edible glitter collection is a starting point for comparing the available palette, while the product page gives the selected bottle count and photographs.
Read the label before planning the effect
Food decoration and craft decoration are separate categories. The FDA advises checking that a glitter or dust is manufactured to be edible and has an ingredient list. A package described only as non-toxic or for decoration is not enough to establish that it belongs directly on food.1 This distinction matters even when a product photograph shows a cake or when the bottle looks similar to one used in an online tutorial.
“Bakers should carefully check the label of decorative products they consider for use on foods.”
U.S. Food and Drug Administration1
RBUGR's selected listing describes a twelve-color edible luster dust set. That description is a reason to inspect the product, not a substitute for reading the actual bottles you receive. Confirm the intended application, directions and ingredients for the color you plan to use. Keep the outer packaging until the event is over so the information remains available when a guest asks about it.
Do not infer a certification from a color name, a photograph or the word shimmer. This guide does not certify the set as suitable for every allergy, dietary preference or guest. If a required detail is missing or unclear, obtain an answer before using the item. A plain dessert presented confidently is a better event choice than a decorated one whose ingredients you cannot explain.
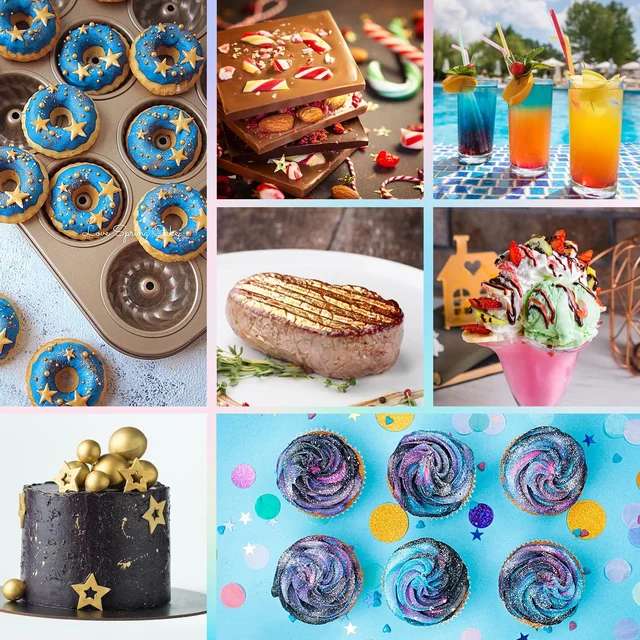
Build a small palette from the larger set
The selected set includes twelve bottles, each listed at 4 g: carbon black, super gold, pearl white, silver gray, coffee brown, rose gold, coral blue, peacock green, lavender purple, lemon yellow, carrot orange and ruby red. A larger assortment gives you options across different occasions. It does not mean every color needs to appear on the same table.
Try choosing one main color, one supporting color and a neutral background. For example, you might plan rose-toned place cards, plain white plates and one dessert with a rose-gold accent. This is a styling proposal, not a tested color recipe. Photograph your test beside the actual plates and linens before committing; packaging colors and screen images are only approximate references.
Separate the concept of color from the concept of sparkle. In the Amazon review sample we checked, one customer liked the color change but expected more visible sparkle. Other customers praised the pigmentation or appearance. Those different impressions are useful: decide whether your goal is a visible hue, a subtle sheen or an obvious moving shimmer, and judge your sample against that specific goal.
If two colors compete, remove one before adding another. A restricted palette is easier to assemble, explain to a helper and reproduce across a batch. Keep unused bottles closed and away from the preparation area until you need them.
Make a test card you can actually repeat
A test is most useful when it records what you did. Choose one real serving of the food or drink, one clean utensil and the same container you expect to use at the event. Follow the product directions and begin with a small amount. There is no universal spoon measurement in this guide because the desired result, base and product instructions can differ.
On a card, record the base, color, amount used, mixing or application method and time. Add a plain-language observation such as subtle color, too dark, uneven finish or difficult to see in this glass. Avoid relying on a phone photograph alone: automatic exposure can make an effect look stronger or weaker than it appears to a guest.
| Record | Your practical question | Why it helps |
|---|---|---|
| Base and serving size | What exactly am I decorating? | Keeps the next test comparable |
| Color and amount | Can I reproduce this addition? | Avoids guessing across a batch |
| Glass or plate | Is this the actual event container? | Shows the result in context |
| Observation time | How does it look at serving time? | Connects preparation with service |
| Decision | Use, adjust or leave plain? | Turns testing into a clear next step |
Change one variable at a time. If you change the base, color and serving vessel together, it becomes difficult to tell what improved the result. One successful, documented combination is more valuable than several attractive samples that nobody can reproduce.
Plan drinks around the moment they are served
For drinks, work backward from the handoff to the guest. Decide whether a host will finish each glass, whether a batch will be prepared shortly before service or whether the drink will be poured from a larger container. Each arrangement needs its own trial. Do not assume a result in one glass will look identical when multiplied into a pitcher.
Observe the sample immediately after preparation and again after the amount of time you expect it to wait. Record any visible change without treating it as a product defect or a guaranteed characteristic. Your aim is to learn what your specific combination does. If appearance depends on a last-minute step, make that step part of the service plan and assign it to someone.
Keep drink identification clear. Decorative color should not be the only way to distinguish alcoholic and nonalcoholic options, or to identify different ingredients. Use readable labels and separate serving utensils where appropriate. A guest should not have to ask whether the pink glass contains a different base from the gold one.
For a self-serve station, reduce choices. One prepared shimmer option and one plain version are easier to manage than a display of open powders beside the drinks. Keeping the bottles with the host also preserves their labels, limits spills and makes it easier to answer ingredient questions. The decorative station should support the gathering rather than become another activity that needs constant supervision.
Give desserts a deliberate finishing point
Think about where the decoration belongs on a dessert. A small accent on a finished surface communicates something different from coloring an entire mixture. Follow the bottle directions for the application you choose, and use a test portion made from the same recipe. This article does not substitute a general painting or mixing recipe for product-specific instructions.
Pick a stopping point before you begin. You might decide to finish one corner of each cookie, one central detail on each cupcake or one feature of a larger cake. A repeated placement gives the table a coherent look and helps you estimate the work. It also makes it easier for a helper to produce the same arrangement without trying to imitate a complicated example.
Handle the finished pieces with the same care you would give the undecorated food. Decorative appearance does not change the recipe's storage needs. Keep the recipe's holding and refrigeration requirements separate from the styling notes, and do not leave a perishable dessert out simply because the table looks better with everything arranged early.
Inspect the first few pieces together before decorating the whole batch. If the effect is too strong, you have time to simplify. A consistent light accent across the tray can look more intentional than a handful of heavily finished pieces followed by an unfinished remainder.
Make ingredient information easy to find
Ask about relevant dietary needs while planning the menu rather than at the moment of serving. The FDA recommends that people with food allergies read labels and avoid foods containing their allergens.2 An attractive description such as colorful, plant-inspired or celebration-ready does not answer an ingredient question.
Keep a simple menu sheet with the recipes, packaged ingredients and decoration used in each item. Record the exact color as well as the product name, because a set contains several separate bottles. If you make a substitution during preparation, update the sheet immediately. A tidy record is more useful than an assurance based on memory.
Provide a plain alternative when practical, but do not label it allergen-free unless you can substantiate that claim, including how it was prepared. Separate utensils and clear identification can help organize your workflow; they are not a universal guarantee against cross-contact. For a guest with a serious allergy, communicate directly and respect the arrangement they consider appropriate.
Keep decorative craft materials away from food preparation. Place-card glitter, adhesive gems and ribbon supplies may be part of the same event plan, but they do not belong beside open ingredients. Set up packaging and food tasks in distinct areas so a helper never needs to guess which glitter is intended for which job.
Budget for the whole project
The selected RBUGR set is listed as twelve 4 g bottles, giving a nominal combined quantity of 48 g. That arithmetic describes the pack, not a guaranteed number of servings. The usable number depends on your chosen application, the amount used and which colors your design needs. If a plan uses only one color, the other eleven bottles are options for later projects rather than extra supply of that shade.
Build the budget around the complete result: food or drink ingredients, containers, decoration, labels and the time needed to assemble it. A low decoration cost does not compensate for an elaborate process that leaves you rushing before guests arrive. Put your effort where it is most visible and where you enjoy the work.
Include a test allowance and a plan for an undecorated backup. Neither needs to be elaborate. A few spare portions and a simple serving option can prevent a minor delay from affecting the entire menu. Review delivery planning before choosing an event date that depends on an order arriving.
After the event, keep the remaining bottles with their original labels and follow the storage directions. Record which combination you liked and roughly how much you used. The useful takeaway is your own repeatable project note, not an assumed universal yield copied from someone else's party.
Use customer reviews as questions to investigate
Customer feedback is most helpful when it sharpens the questions you ask before buying. The review sample for this set included praise for vivid color and small-amount application, a comment that drink sparkle was subtler than expected, and a report of containers opening during delivery. These are individual experiences from the Amazon page checked on September 16, 2026, not controlled tests or a prediction of your order.
Translate those observations into practical actions. Test the visual effect in your real serving container. Add powder cautiously according to its directions. Inspect the delivered box before putting it away for an event. If a container arrives open or damaged, use the order's support route rather than treating the affected contents as ready to serve.
Do not use a customer's statement about taste, allergies or safety as proof for your guests. Likewise, a high average score does not establish that a color will meet your particular design goal. The product detail page separates the dated Amazon rating from our own selection guidance so you can evaluate both in context.
Our review notes are paraphrases, not newly collected RBUGR testimonials. We preserve the distinction because helpful shopping information should make its source clear.
A manageable workflow from delivery to table
When the order arrives, inspect the pack, check the labels and confirm that the colors you intended to use are present. Choose your test recipe while there is still time to change the design. Record the successful combination and make a short list of the equipment needed to repeat it.
Before preparation, clear the work area and place only the chosen bottles nearby. Arrange finished and unfinished portions in visibly separate groups. If a second person is helping, show them one completed example and explain the stopping point. Agree on where labels and empty packaging will be kept so important information does not disappear during cleanup.
At serving time, check identification, presentation and the undecorated option. Keep the host's task list short: replenish, answer questions and maintain the recipe's required storage conditions. A decoration that needs continuous adjustment may be better reserved for a smaller occasion.
For a coordinated take-home favor, pair the table's color scheme with a separate, clearly packaged gift. Our lip balm favor guide covers quantities and presentation without treating cosmetics as food. If you are making a wooden display for the table, see our surface-preparation planning guide; only use a finished display for its intended purpose and keep food on suitable serving dishes.
Keep a useful record for the next occasion
After the gathering, take five minutes to record what was easy and what became a distraction. Note whether the chosen glass showed the effect well, whether a helper could reproduce the sample and whether the serving labels answered guests' questions. These observations concern your event setup; they do not need to become universal product claims.
Store the successful test card with your menu notes, and include one photograph taken under ordinary room lighting. Record the exact color you used rather than calling it the pink bottle. If a bottle or package changes before the next occasion, check the new instructions instead of assuming the old note still covers it.
A repeatable idea is more valuable than an elaborate one that depends on guesswork. Your next celebration can reuse the successful arrangement, adjust the palette and leave the rest of the menu simple. That is how a twelve-color assortment becomes a practical resource across several different occasions.
Sources and editorial notes
This is original RBUGR editorial planning guidance, not a laboratory test or a recipe validated for every food. Product facts and the review sample were checked on September 16, 2026. Photos show the actual listed product; styling ideas are suggestions. Confirm current ingredients and directions on the delivered package.
- FDA: Avoid non-edible food decorative products. Source for label checks and the distinction between edible decoration and non-toxic craft materials.
- FDA: Food allergies. Source for reading ingredient labels and avoiding known allergens.